Curving Corner Texture UVs
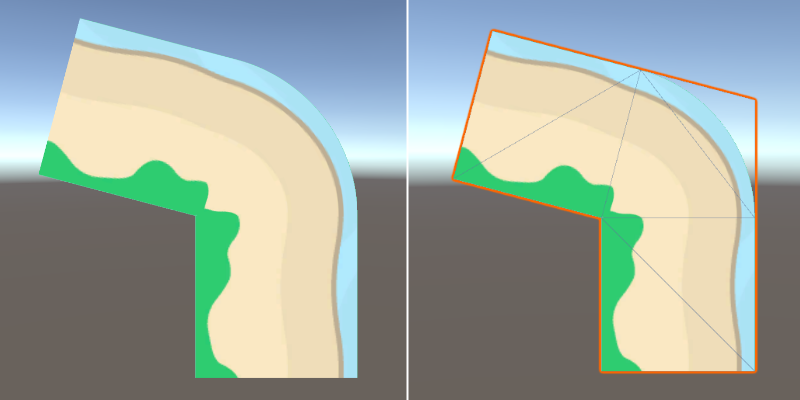
About 4 years ago while working on Griftlands I had a rendering problem that I didn’t solve to my satisfaction: I wanted to smoothly curve a repeating texture around a corner for shorelines, as well as transitions between different ground materials.
What I implemented at the time was “ok”, but still resulted in visibly sharp UVs on some corners, especially on shorelines which were animated with a smooth gradient, making any discontinuities more obvious.
The details were very small on screen, and you had to squint a bit to see them, but I knew they were there and it bothered me.
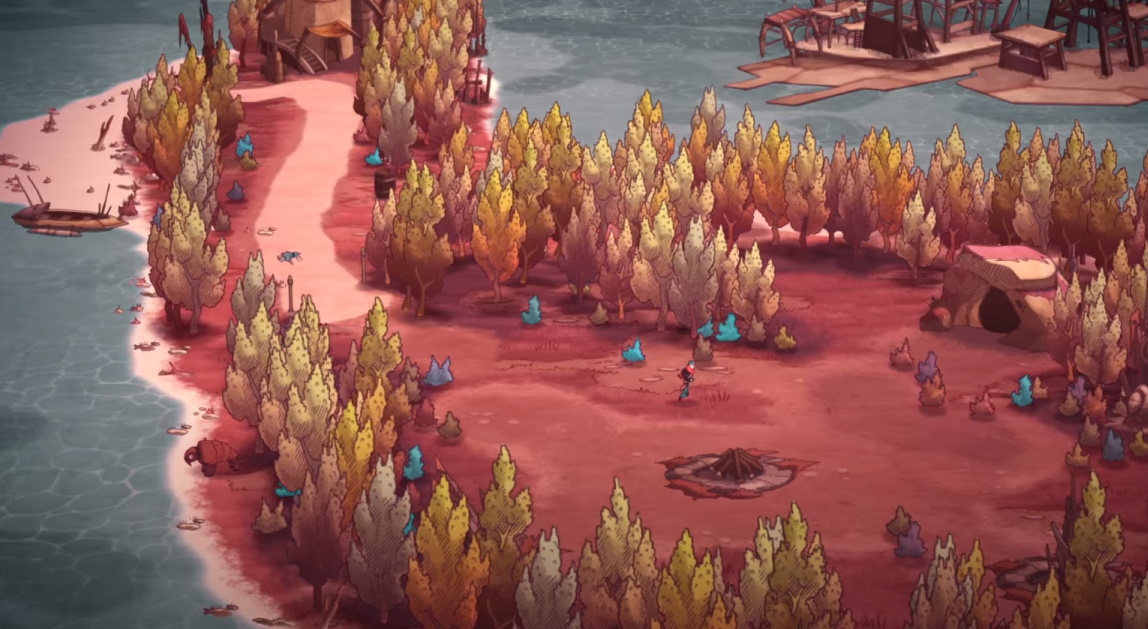
Griftlands Trailer - PC Gaming Show 2017
This functionality is no longer in the game, as the ability to walk around in the open world has since been removed. But you can see it briefly if you go all the way back to the PC Gaming Show 2017 Griftlands Trailer.
I kept meaning to return to the problem and find a better solution. Recently something reminded me of it, and while having a shower I was thinking over how to phrase the question in a way that I could ask for advice, but in doing so I figured out a solution for myself.
Old and broken
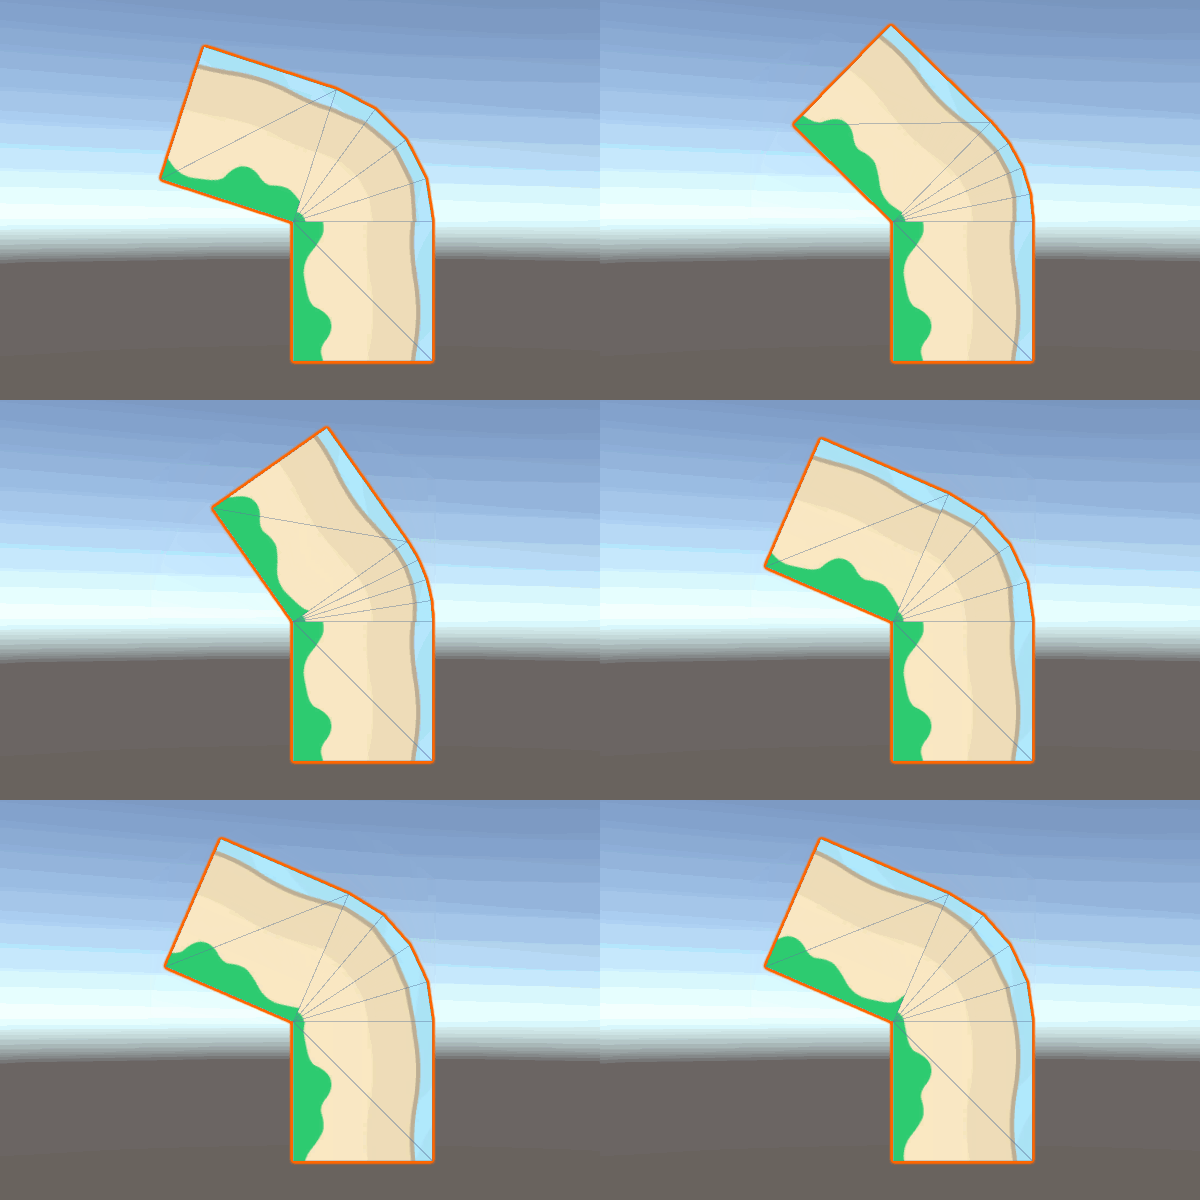
Chunky
The original solution was simply to add additional triangles in a fan around the corner. Geometry wise this works fine as it was quite small on screen, and you could increase the polygon count to smooth it out even more if you wanted.
And this works reasonably well when using “messy” ground textures, however the interior triangle edges become visible when there are smooth edges present in the texture, which was the case with the shoreline.
The shoreline texture I’m using here is from a Kenney asset pack.
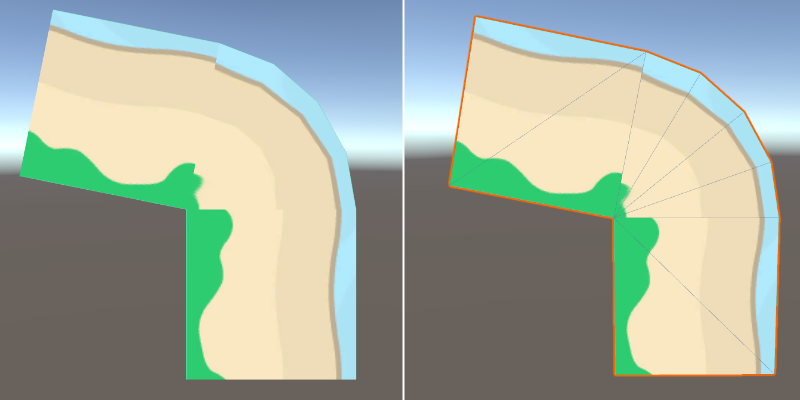
Original Solution (approximate)
As an example I recreated approximately how the original corners were handled.
The problem is that the UVs are interpolated in a straight line from one edge of each triangle to the other.
My intuition at the time (if I remember correctly) was that there should be a better way of calcuating the UVs for the triangles in the fan. But I wasn’t able to sort out what exactly that might mean in practice.
As far as I know, there isn’t a way to do a simple interpolation that will appear correct both at the outer edge and near the inner vertex.
New hotness
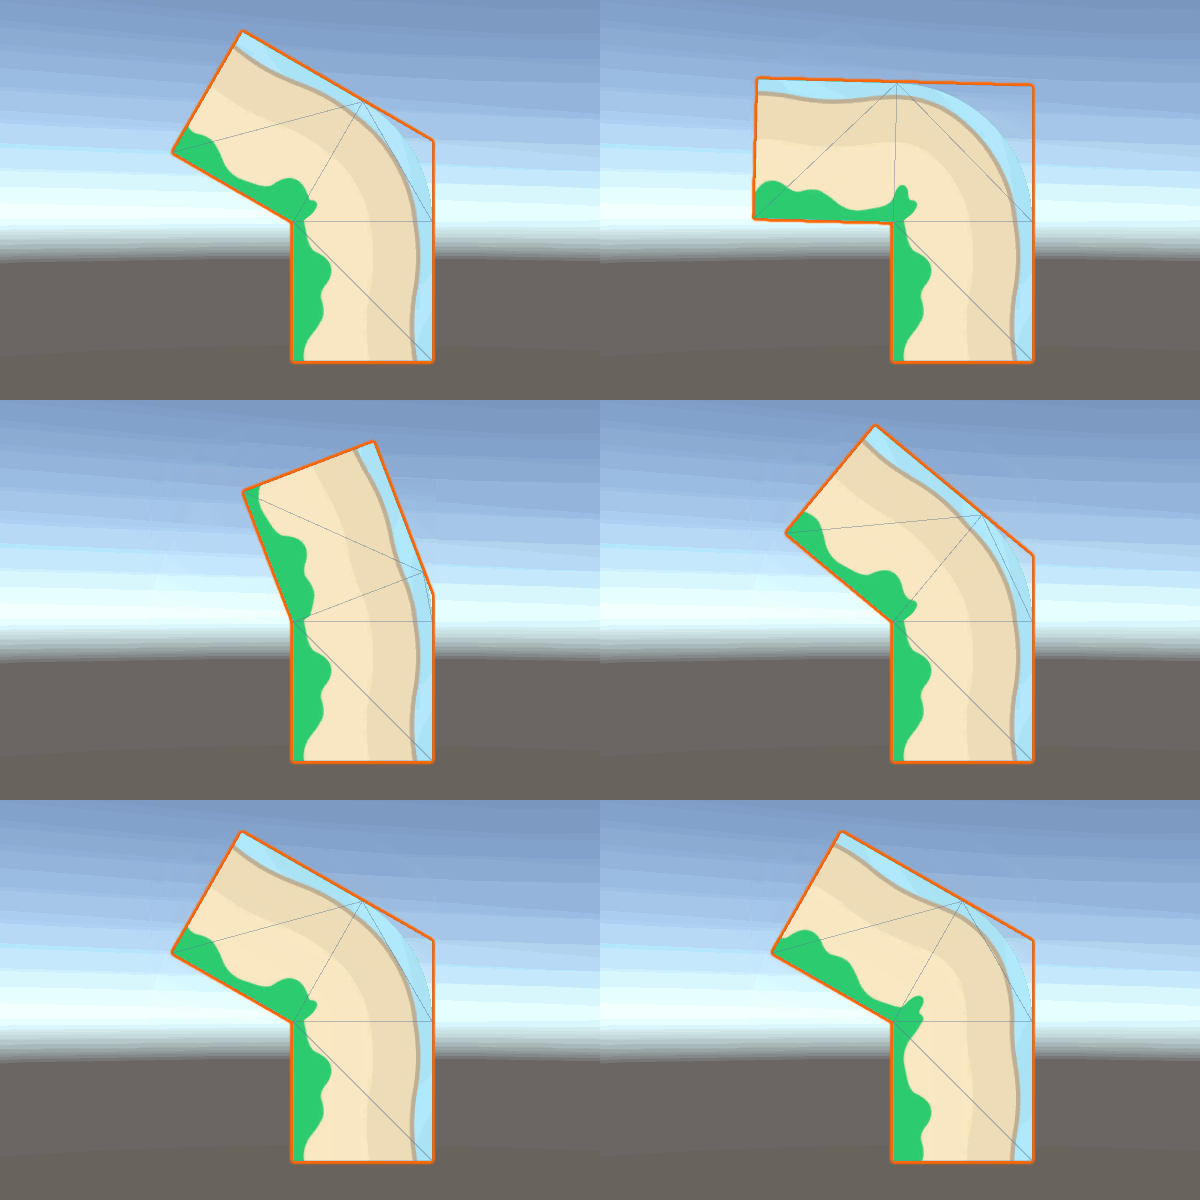
Smooth
There are two shaders (and two Unity materials) being used, the standard Unlit Texture shader for both of the squares on the ends, and a custom shader for the corner.
Additionally, there is a script on the object that regenerates the mesh, and calculates the UV scrolling offsets as well as the UV coordinate positions of the corner vertices.
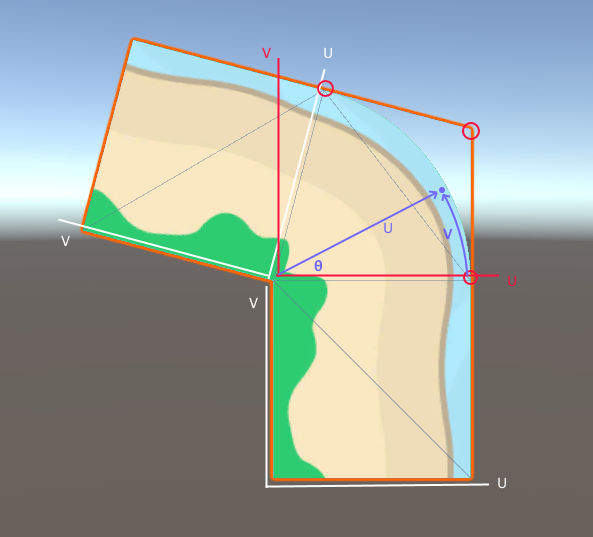
Diagram A
Please forgive my lack of diagramming skills.
So how does the new solution work? Arc length!
In the diagram above, the white UVs on both of the square portions of the mesh are completely standard defaults.
There are two separate stages to calculating the UVs for the corner triangles.
- The C# script calculates the starting UVs of the corner vertices (circled) by rotating the UVs relative to the UV space marked in red. So for example, the top left UV might be approximately
(0.1, 0.9), the top right(1.0, 0.7), and the bottom right(1, 0). - The shader translates the UV at each pixel from this square UV space (in red), into a curved UV space (in blue). U becomes the radius from the inner vertex, and V becomes the arc length of the angle of line.
For U values over 1, alpha is set to 0, creating the rounded transparent edge.
Note that we want our V to be the same at all points along the U radius, so I calculate the arc length with a fixed radius of 0.5, not the radius at the pixel we’re currently shading. If you use the actual radius of the current pixel, the curve will distort in a swirl pattern and not line up on the other side.
0.5 will keep the mid part of the texture an even size, and stretch it slightly towards the edge. You could use 1 if you wanted to eliminate the stretch on the outer edge, with the tradeoff being tighter pinching near the inner vertex.
The script performs two other important functions:
- The total arc length of the corner is added to the V offset of the “following” square, so that it matches up with the maximum V value within the curved corner.
- The outermost corner vertex position is moved into place based on where the “outside” edges would meet.
Script Highlights
The position (and UV) of the final (movable) vertex of the corner is rotated using the quaternion edge_rot, which is also used to rotate all of the vertices of the second square.
The position (and UV) of the outermost corner vertex is calculated as width, height * Mathf.Tan(theta * 0.5f)
(theta is just degrees converted into radians)
float r = 0.5f;
float theta = degrees * Mathf.Deg2Rad;
float arclen = theta * r;

Quaternion edge_rot = Quaternion.Euler(0, 0, degrees - 90f);

Vector3[] vertices = new Vector3[12]
{
    // first box
    new Vector3(0, -height, 0),
    new Vector3(width, -height, 0),
    new Vector3(0, 0, 0),
    new Vector3(width, 0, 0),

    // second box
    Quaternion.Euler(0, 0, degrees) * new Vector3(0, 0, 0),
    Quaternion.Euler(0, 0, degrees) * new Vector3(width, 0, 0),
    Quaternion.Euler(0, 0, degrees) * new Vector3(0, height, 0),
    Quaternion.Euler(0, 0, degrees) * new Vector3(width, height, 0),

    // corner cap
    new Vector3(0, 0, 0),
    new Vector3(width, 0, 0),
    edge_rot * new Vector3(0, height, 0),
    new Vector3(width, height * Mathf.Tan(theta * 0.5f), 0),
};
arclen (at r = 0.5) is added to the V offset on the movable second square.
Vector2[] uv = new Vector2[12]
{
    new Vector2(0, 0+offset),
    new Vector2(1, 0+offset),
    new Vector2(0, 1+offset),
    new Vector2(1, 1+offset),

    new Vector2(0, 0+offset+arclen),
    new Vector2(1, 0+offset+arclen),
    new Vector2(0, 1+offset+arclen),
    new Vector2(1, 1+offset+arclen),

    new Vector2(0, 0),
    new Vector2(1, 0),
    edge_rot * new Vector2(0, 1),
    new Vector2(1, Mathf.Tan(theta * 0.5f)),
};
Shader Highlights
len the magnitute of the UV is used as the U texture coordinate, as well as the alpha cut-off.
Out angle theta is calcuated from the reference UVs with atan2(i.uv.y, i.uv.x)
arclen is used as the V texture coordinate (plus any specified texture offset for scrolling).
float len = length(i.uv);

fixed4 col;
col.a = 1-step(1, len);

float r = 0.5;
float theta = atan2(i.uv.y, i.uv.x);
float arclen = theta * r;

float2 uv;
uv.x = len;
uv.y = arclen + _VOffset;
col.rgb = tex2D(_MainTex, uv);
Unity Sample Project
Quality and reliability of example is not gauranteed. It’s probably not useful as-is, but should serve as a starting point if you want to use it for something.
The offset and degree values of the script on the GameObject can be changed in the inspector at runtime to observe the effects.